Saturday, September 29, 2012

Black Beans 101

Black beans are not widely used or available in Australia, which is sad, because they are so delicious not to mention super healthy. Lucky for me the Kakulas Brothers in Northbridge, Perth have bulk bins of almost everything you could desire, including dried black beans.

I attempted cooking black beans once before with poor results because I boiled them and discarded the cooking water - amateurs mistake. They require more time and effort than other dried beans, but after discovering the absolute brilliance that is Martha Rose Shulman and her guide to Black Beans as part of her awesome recipe series with the NY times called Recipes for Health, I think my cooking abilities are about to take a leap forward.
 
On her website she says, "I draw my inspiration from Mediterranean and Mexican cuisines, inherently healthy cuisines with big flavors, whose recipes can be easily adapted, if they need to be, to lower-fat versions without compromising flavor"... I want to meet this woman!
 
This recipe is pretty much Martha Rose Shulman's to the letter, it takes a good 2-3 hours and completely worth the time and effort. 

I am tired of the excessive foodie language used today in Australia. Comments like "I love how the saltiness of the fish sauce is balanced by the sweetness of the palm sugar", or "I love the way the lemon zest brings out the flavour of the beans" are so over used and drive me bananas. For this reason I avoid being too verbose when describing food.

But for this recipe I can't help it. The rich earthiness of these black beans has to be tried to be believed, it is deeply satisfying.There I said it..

When you have time, give this recipe a go, you won't regret it!

 
2 cups dried black beans, washed and picked over for stones
1 tablespoon canola oil
2 medium onions diced
6 large garlic cloves roughly chopped
1/4 cup chopped coriander
Salt to taste 

Soak the beans in about 2 litres of the water for at least six hours. If they will be soaking for a long time in warm weather, put them in the refrigerator.
 

Heat the oil over medium heat in a large, heavy soup pot or Dutch oven, and add the onion. Cook, stirring, until it begins to soften, about three minutes.

 
Add the garlic. Cook, stirring, until fragrant, about one minute.
 
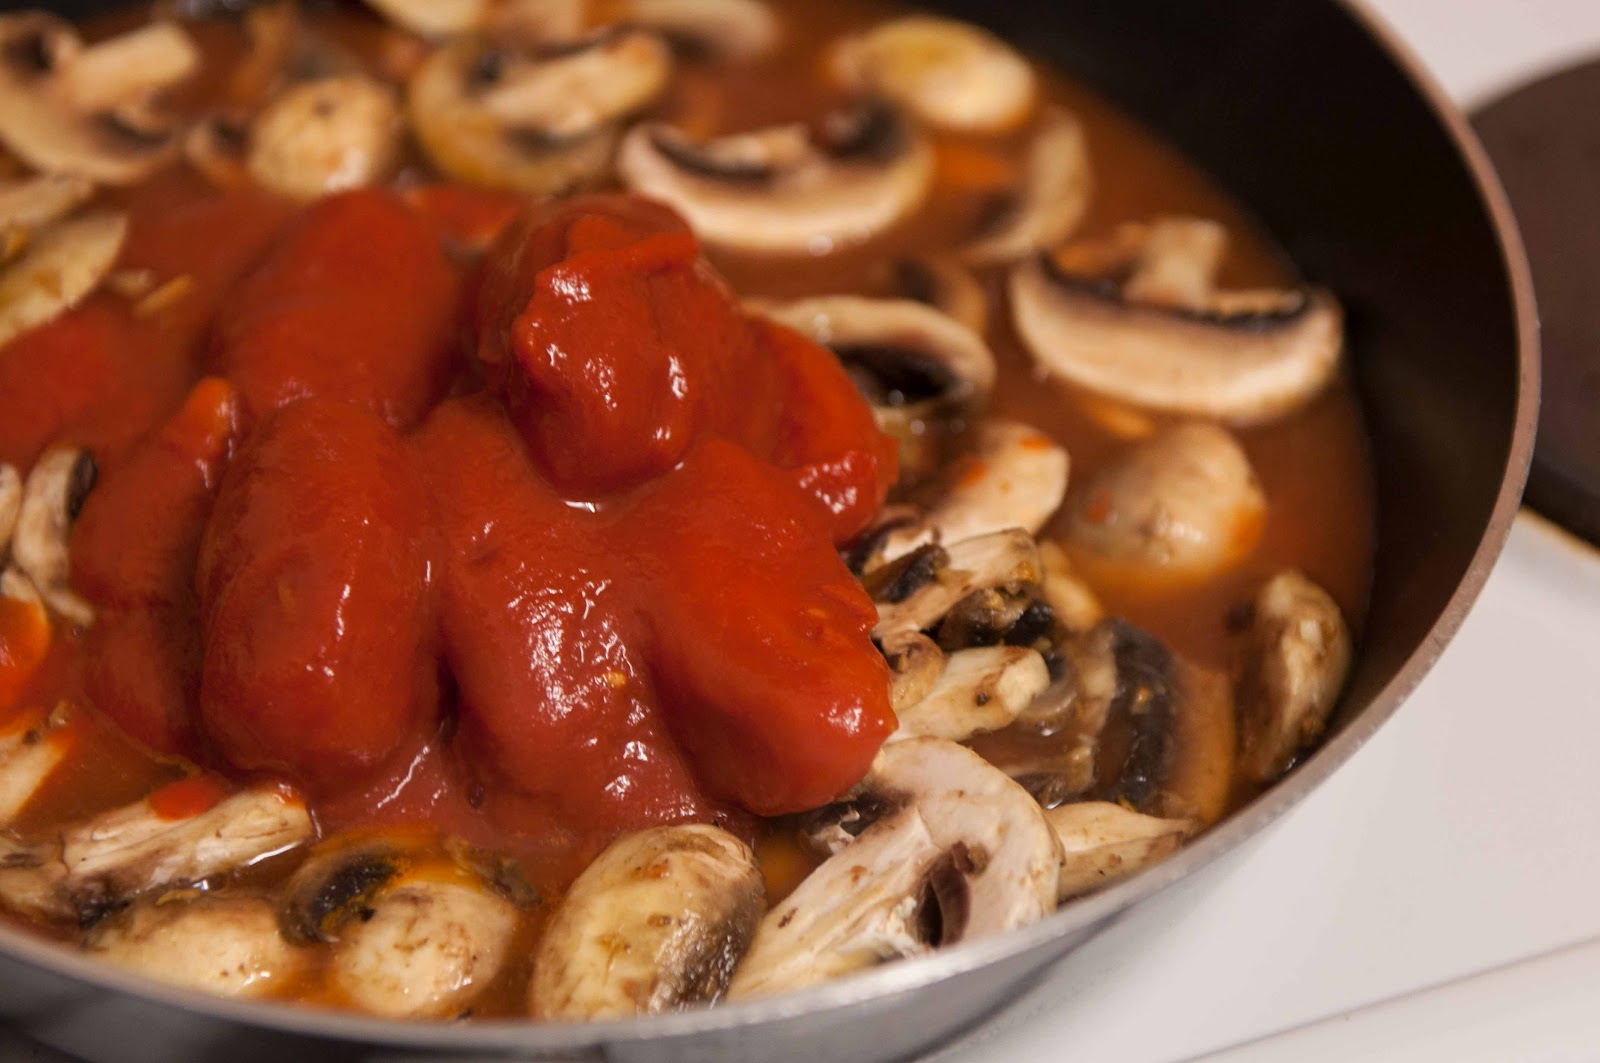
Add the beans and soaking water. The beans should be covered by at least an inch of water. Add more as necessary and bring to a boil. Reduce the heat to low, and skim off any foam that rises.


Once it comes to a boil, this is when I put mine in the oven at about 170 degrees for an hour, alternatively simmer on a low heat for an hour.


Add salt and fresh coriander and simmer for another hour.
 
The beans will become soft and the broth thick and fragrant. Taste for salt.
T

Let sit overnight in the refrigerator for the best flavor.
 
 
I ate mine with brown rice, coriander, spring onion, lettuce, jalapenos, fresh chilli, black olives and a couple of corn chips. Some sour cream or natural yogurt would have been good, but it wasn't missed.

Friday, September 28, 2012

Tasty Tomato and Mushroom Pasta

Pasta with a tomato based sauce made from scratch is one of the most economical dinners around. It's also a classic example of simple Italian flavours making a deeply satisfying meal. Today I made one with mushrooms and anchovies, other great combinations include sopressa & red capsicum, tuna & capers, zucchini & eggplant or olives, sun dried tomatoes & bacon. A rich twist with a dash of cream makes a rosé sauce, which is extra fattening and delicious.

The secret to a great tomato pasta sauce is patience. You need to simmer the sauce for an hour, it makes a world of difference. I don't know why, it just does.

I tend to add some combination of anchovies and vegetables, if you don't like anchovies, I recommend you try adding just one or two. You won't even taste them and it adds a depth of flavour that is hard to match.

Fresh basil at the end is always good, although it's still early spring and pretty expensive in the shops so I didn't use any today
 
Tasty Tomato and Mushroom Pasta - serves 2
 
4 cloves garlic
1 tin tomatoes
olive oil
 
8 mushrooms sliced
6 Anchovy fillets
 
250gm wholemeal pasta

Parmesan cheese and spring onion to garnish

 
Start by frying 6 anchovy fillets (or your fatty meat of choice e.g. bacon/sopressa/pepperoni) and 4 cloves of roughly chopped garlic on a low heat until the anchovy breaks up and the garlic softens.

 
Add the mushrooms and sauté for about 5 minutes

 
Add one tin of tomatoes and 1 cup of water, bring to boil and then simmer for an hour.
 
 
The sauce will be become rich and thick, add a little water from the pasta to thin it out if needed

 
Taste the sauce for pepper, salt and sugar.
 
Because the tinned tomatoes I use aren't very sweet I usually end up adding about 1/2 to 1 teaspoon of sugar.


Add the cooked pasta to the sauce and stir through
 
 
A sprinkle of spring onion, parmesan cheese and olive oil finishes this nicely

Tuesday, September 25, 2012

Super Simple Burrito Wraps

Like the post title suggests, this is a really fast, satisfiying meal that you can make within minutes of walking through the door. It would probably taste even better if you had the time to make my roasted corn salsa but sometimes you're too tired to even think about cooking let alone doing it.
 
you will need...
 
wholemeal wraps (I like to buy mission brand)
A tin of refried beans
sliced black olives
chilli sauce/Jalapeños
natural yogurt/sour cream
avocado
lettuce
spring onion
tomato
coriander
 
 
Just cut up the vegetables and you're ready to put this baby together.
 
I zap the wrap in the microwave for about 30 seconds and then put down a smear of refried beans and sprinkle on the rest.

 
If you have more time you could sprinkle the beans with cheese, onions and olives and put it under the grill for a couple of minutes to melt the cheese, then add the salad and yogurt at the end
 
Or wrap it up and put in the sandwich press to toast.
 
the choice is yours!

Larb Chicken Salad

This recipe is one I've learnt not to experiment with and follow to the letter. It's deceptive in it's simplicity. I used to try and add more things like coriander or nuts, but it needs nothing else I promise. Traditionally it is eaten inside a lettuce leaf similar to like san choy bow. It also tastes great with jasmine rice or vermicelli noodles. I served it along side two Indonesian curry's (that I didn't have the energy to photograph, but I promise I will post them in the future).
 
These photos are from when I made a double batch with pork, which is traditional, but wasn't as well received as chicken normally is (the butcher only had chicken breast mince that didn't have a scrap of fat in it which would have been dry and grainy). The pork was also a bit smelly and I guess that put some people off... Lesson learned, some people aren't big fans of pork. But as a chicken dish it is usually a bit hit.
 
for one batch you'll need... 
 
 
2 tbl uncooked jasmine rice
500 gm chicken mince
2 tbl finely chopped lemongrass
1/3 cup water
3 tbl fish sauce
3 tbl lime juice
1/2 cup of mint
1 red onion finely diced
3 spring onions finely chopped
3 small hot red chilli's (seeds removed if you want it mild)
  
 
The weirdest part of the recipe is how you prepare the rice. First you dry roast it in a fry pan until it browns. Then crush it in a mortar and pestle until it looks like crushed nuts. It adds texture to the salad and is missed if you forget to put it in.
 
 
Finely dice the mint, onions, lemon grass and chilli
 
 
Cutting up these vegetables is the only really time consuming step. I use my mandolin for the red onion, it makes a huge difference!
 
 
To cook the chicken mince, put the lemon grass, 1/3 cup water and meat into a fry pan on a moderate heat and continue to stir until the meat is cooked through but not browned.
 
Carefully drain off the water and add the meat to the salad with the crushed roasted rice. I like adding the meat when it's hot because it slightly cooks the onions and mellows their flavour slightly.


It's best eaten still slightly warm or at room temperature, but always great the next day in your lunch box!

Friday, September 21, 2012

Burrito Salad with BBQ'd Corn Salsa

In Australia, we make just about the worst Mexican food on the planet. It's usually a soggy, refried bean sloppy mess covered in cheese (Old El Paso anyone...?). Sadly this means many people think they don't like Mexican food without ever really experiencing it. I haven't actually been to Mexico - but in Canada Mexican food is everywhere and it's often fresh, interesting and delicious. Even their standard pub nachos are 100 x better than any Mexican meal I've had in Australia.
 
Like many international cuisines, I think the key to great Mexican is having a variety of flavours and textures on you plate. I started out making this burrito salad with chilli con carne as an alternative to just eating it with a big pile of rice and nothing else. These days I often omit the beef all together and eat is a vegetarian meal. Today I made it with a spicy beef kebab - therefore the word Mexican it used rather loosely with regards to the beef part of the meal, but I think the flavours still worked pretty well.
 
BBQ'd Corn Salsa
 
1 avocado
1 cob corn
juice of 1/2 lime
1 spring onion
1/4 of a red onion
1 tomato de-seeded
handful of fresh coriander
1 chilli (optional)
 
 
Cooking corn on the BBQ makes it smokey and sweet. I know some people think you need to soak corn overnight before BBQing - I don't. I just peal off the husk and put it on a low heat for about 30 minutes, turning frequently. If you rub a little oil on it, it will cook quicker, but I prefer not to. Don't worry if some kernels burn a little, it just adds more flavour.
 
While the corn is roasting away, finely dice the spring onion, red onion, tomato, coriander and fresh chilli
 
 
Once the corn is cooked, let it cool for a couple of minutes and then cut the kernels off using a sharp knife. Stir it through the rest of the salsa and then gently stir through one diced avocado and a little lime juice.

 
Spicy Beef Kebab Marinade
 
1 tsp cumin seeds
1 tsp lemon rind
1 tsp dried chilli flakes
pinch of mixed spice
1 clove of garlic
1 spring onion
1 tsp honey
salt
 
 
Pound the chilli flakes, cumin and mixed spice in a mortar and pestle

 
Add garlic, lemon rind and spring onions to mortar and pestle and pound into a paste

 
Mix in honey, oil and salt.  I marinated about 250gm of rump steak for about an hour, then BBQ it on metal kebab sticks
 
Burrito Salad
 
BBQ'd Corn Salsa
Spicy Beef Kebab
Refried beans
Brown rice
Lettuce
Celery
Black olives
Natural yogurt


Wednesday, September 19, 2012

Tuna, Brown Rice & Green Lentil Salad

This post is a variation on a theme, salad of grains/pulses + fresh vegetables + onion + herbs, therefore it looks pretty similar to my couscous salad and chickpea salad recipes, but just different enough to keep things interesting as well as healthy! This recipe makes a pretty big salad, enough to keep you going for lunches at work for the week, or to take to a BBQ at a friends place. When I make it for lunches I make it really lean, no dressing or oil, that way it lasts longer and when I pack my lunch for the day I can either keep it super lean or put a blob of mayonnaise/dash of olive oil on it.
 
The rate determining step in this salad is cooking the brown rice and lentils. Both medium grain brown rice and French/Puy green lentils take 30 minutes to boil - so I put them in the same pot. I might be committing some kind of terrible lentil sin doing this, but it seems to work perfectly every time. Yesterday I bought some green lentils and the miss-informed sign about the bulk bin said you must soak overnight before cooking-total rubbish!
 
Tuna, brown rice and green lentil salad


1/2 cup uncooked brown rice
1/2 cup uncooked french green lentils

3 sticks of celery
3 spring onions
1/2 a red onion
1 red capsicum
2 tomatoes (seeds removed)
1/2 a zucchini

large bunch of parsley
20 mint leaves
small handful of coriander leaves
large tin of tuna

Place the lentils and brown rice into a saucepan with cold water,bring to boil and simmer for about 30 minutes. Testing the brown rice to confirm when it is cooked

While the lentils and rice are cooking, it's time for your meson plus!


Finely dice the onions, vegetables and herbs.

 
then add the drained tuna, I buy SAFCOL "responsibly fished, pole and line caught tuna" based on the 2011 Canned Tuna Greenpeace Guide.
 
 
Once the rice and lentils are cooked, drain and rinse with cold water. Allow to cool then add to the rest of the salad.
 
 
And you're done
 
 
Today's lunch, tuna, brown rice & lentil salad with a boiled egg, some black olives and capers!
 

Monday, September 17, 2012

Banana, walnut & date wholemeal muffins

My new found excitement for wholemeal flour has taken me back to baking. I find cooking with wholemeal flour pretty intimidating, probably because I've eaten some rather bland, dense and dry wholemeal things in my time. On the flip side, I've eaten some really delicious wholemeal breads and pastries too... So down the rabbit hole I go... This recipe was easy and the result was moist and delicious!

My foray into wholemeal baking begins with  muffins! This recipe is from an awesome vegetarian cook book I bought while in Canada, called ""New Vegetarian Basics" by Nettie Cronish. It's full of recipes I would never think to create on my own.

This muffin recipe is more or less identical to the one in this book, except; (1) I added more walnuts (1 cup instead of 1/2 cup); (2) I didn't have cinnamon or all spice, so I used 4 tsp of mixed spice, instead of 2 tsp cinnamon & 1 tsp all spice and (3) she uses 1/4 cup molasses and 1/4 cup maple syrup, both of which are pretty expensive in Australia, so I used 1/2 a cup of golden syrup instead.

There are three tricks to baking a perfectly yummy muffin; (1) always mix your wet and dry ingredients separately; (2) when you combine the wet and dry - don't over mix the batter because it will make your muffins tough and dense and (3) keep a close eye on them in the oven, being careful to not over cook them and dry them out. I'm a big fan of testing regularly with a satay stick.
 
preheat your oven to 190 degrees

 
Ingredients
2 cups wholemeal flour
1 cup wheat germ
2 tsp baking powder
4 tsp mixed spice
1/2 tsp baking soda
1 cup mashed bananas (about 2 large)
1 cup soy milk (full fat)
1/3 cup canola oil
1 egg
1/2 cup golden syrup
1/2 cup chopped dates
1 cup coarsely chopped walnuts
 
 
Take two bowls
 
In one bowl mix together the dry ingredients
(flour, wheat germ, baking powder, baking soda & mixed spice)
 
In the other, whisk all the wet ingredients
(milk, bananas, oil, egg, golden syrup)


 stir the wet into the dry until it's almost all moistened
 
 
add the dates and walnuts - I cut mine very roughly, so my muffins were rather chunky!

 
stir until the batter is just combined
 
 
Spoon the mixture evenly into 12 greased muffin cups (I greased the tray with a little extra canola oil), bake at 190 degrees C for 15 to 20 minutes (until cake tester comes out clean).

 
cool in pan for 3-5 minutes then cool on a wire rack
 
 
Enjoy at your leisure

Friday, September 14, 2012

Vietnamese Chicken Salad

This is by far one of my all time favourite recipes! It's pretty close to Luke Nguyens Char grilled pork neck with vermicelli noodles, classic street food fare. Instead of pork neck, I used chicken thighs. In the past I have made with pork neck and also using rump steak, both worked really well. I prefer chicken thighs over breasts because; (1) because they taste better; (2) they are fatty and juicy and hence (3) more forgiving when BBQ'ing

As I've said previously, what constitutes "free-range" according to standards in Australia is not always what I consider to be "free-range". Since moving to Western Australia, I've started buying Mt Barker free range chicken. My favourite thing about Mt Barker Chicken is their website clearly outlines their free-range standards, which includes how they define access to free range -

"At least 50% of the building sides must open to allow chickens access to the free range area for new farms, and RSPCA Approved Free Range Standards for existing farms. Birds must have access to the range as soon as they are reasonably feathered and at the latest between day 21 - 28."

Which is far more generous than the free-range standards suggested by other regulatory organisations. At the end of the day, short of driving out to the farms and having a look for myself, you have to take a leap of faith and chose a chicken supplier if you want to eat chicken. So I vote with my dollar and buy Mt Barker free-range chicken!

Before I begin with the recipe - a quick note on the salad dressing: because it's easier, I usually eat my salad with a little fish sauce and a squeeze of lime. If you want more dressing, I recommend making a nuoc chum dressing, I found a recipe for a really good one here. Try to make it a few hours or a day before to help the flavours mix and the garlic to pickle a little.

Vegetarian Note: If you want to make this salad with tofu, I recommend using fresh tofu with a nuoc chum dressing made with vegetarian fish sauce.

Alright, now for the cooking!

First thing to do is marinate the meat. Luke recommends marinating 2 hours to over night, but last night i only managed an 1 hour, which still worked really well.


Meat Marinade (straight from Luke)
6 white part spring onion, finely sliced,pounded into a paste
2 tablespoons sugar (I used brown)
1 tablespoon honey
4 tablespoons fish sauce
1 teaspoon freshly ground pepper
2 garlic cloves, finely diced
2 tablespoons vegetable oil

In a mortar and pestle pound the whites of the spring onions, chopped garlic and sugar


then add the fish sauce, honey, pepper and oil

 
I made it using 4 chicken thigh fillets roughly diced. I don't worry too much about how I cut the meat because I use metal skewers, meaning I can thread a single piece of meat two to three times regardless of its dimensions.
 
 
Second toast your peanuts in the oven or under the griller/broiler. I only say this because I keep forgetting until right at the end and it drives me crazy! Keep an eye on them because they burn easily - roughly chop when done.
 

Third cut up all your salad ingredients

lettuce
spring onions
mint
coriander
red onion
carrots
tomatoes
cucumber


Fourth, put the meat on the skewers


Fifth soak the vermicelli in hot water for about 5-10 minutes (I buy them already bunched in individual serves to save tiny pieces of noodle flying across the room) test them to see when they are done, then drain and rinse with cold water.


Sixth put your chicken on the BBQ to cook. I cook mine on a Weber baby Q. I cook them pretty slowly on a low heat to prevent the marinade from burning and to give the fatty chicken thighs time to render down.


Seventh while you are waiting for the meat to cook, assemble the salads, palace the vermicelli on the bottom and then add the salad and herbs


Eighth, once the chicken is cooked, you are good to go!


finish off your salad with roughly chopped toasted peanuts, chilli, a squeeze of lime and a dash of fish sauce (or nuoc chum if you so please)

 
Seriously, if I had chose one food to eat for the rest of my life, I think this would be it...